Hobo Mittens
This is my take on hobo mittens. There are only a few steps to make a unique wrist warmer.
Supplies:
An old sweater or knee high socks. I found this sweater at the dollar store. How is that for a score!
sewing machine, and coordinating thread.
a few pins to mark your lines.
- Cut your sleeves to the desired length. You can make these long to your elbows, short and a little past your wrist, or anything in between. It's up to you.
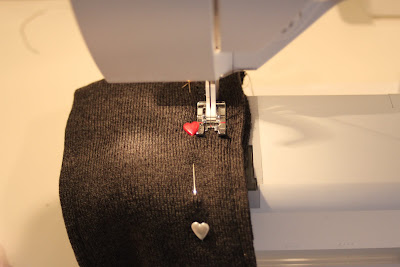
Place your arm on the sleeve (with your thumb to the original seam of the sweater) to get an idea of where you are going to trim up your mitten. I had to make a pattern of my arm because I couldn't take pictures and hold my arm down at the same time. It might be easier for you to just make a pattern. You want the sleeve to cover your knuckles. Keep that in mind when you put your real, or paper arm on the sleeve. Place your pins to mark where you will begin sewing in and down the arm. Knit is stretchy, so I find it easier to sew and them trim away the excess.
3. Back stitch, or fix stitch, the begining right on the original seam. I gradually tapered in about an inch. The amount you sew in depends on how big or small you sweater sleeve is to begin with.
4. Sew your seam all the way to the end of the sleeve.
5. Try your sleeve on to make sure you took in enough fabric. It is easier to take in a little at a time if you are unsure. It's hard to pick thread out of sweaters. Trust me;) When you are satisfied with the fit go ahead and trim the excess fabric about 1/4 inch away from the seam.
6. Use a pin to mark your thumb seam, give yourself about an inch or little more. Use another pin to mark about a 1/4 inch to the left of the first pin. Sew your first pin seam straight down 3/4- 1 inch. Be sure to back stitch the begining and ending of the seams. Your second seam is going to angle from the top of the pin head (1/4 inch away from the first seam) to the bottowm of the first seam. You should have a awkward "V." Using scissors, snip the fabric in between the two seams. Don't cut through your stitches!
In this picture you can see the cut at the top. I took this picture and then ending up sewing the seam longer, so your "V" cut should be deeper than the one in the picture.
7. Roll your unfinished end (the one towards your elbow) under and sew a straight stitch to hem it.
Now add your embellishments. I added a melted flower to this one and some fabric covered buttons to another pair.
Your hobo mittens are complete. Now go make a pair.
Or maybe you need to make two or three pairs;)


Không có nhận xét nào:
Đăng nhận xét